

TL;DR
The Android Toolbar is a highly flexible ViewGroup and the modern, recommended replacement for the traditional ActionBar. It offers superior customization, allowing it to be placed anywhere within an activity's layout and styled extensively to match your app's branding. Implementing a Toolbar involves adding the widget to your XML layout, using a theme that disables the default ActionBar, and then programmatically setting the Toolbar as the app bar in your Activity's Kotlin or Java code.
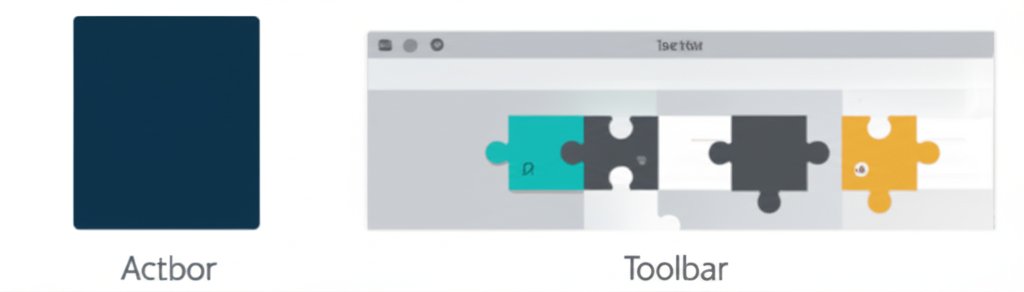
Understanding the Android Toolbar: Core Concepts and Evolution
In modern Android development, the Toolbar is a fundamental UI component for presenting user actions and navigation. Introduced in Android Lollipop (API 21), it was designed to be a more versatile and powerful successor to the rigid ActionBar. Unlike the ActionBar, which was fixed to the top of an activity window, the Toolbar is a true ViewGroup. This means you can treat it like any other view in your layout file—place it anywhere, animate it, and embed other views inside it.
The primary advantage of the Toolbar lies in its flexibility. Developers gain granular control over branding, theming, and functionality. Key features you can integrate into a Toolbar include:
- Navigation Button: An icon at the start of the Toolbar, often a drawer menu icon (hamburger) or an 'up' arrow for navigating back.
- Brand Logo: An image or icon representing your application's brand.
- Title and Subtitle: Text to inform the user of their current location within the app.
- Action Menu: A set of icons for the most common actions on a screen, with less frequent actions placed in an overflow menu.
- Custom Views: Since it's a
ViewGroup, you can add any custom view components, such as a search bar or profile image, directly into the Toolbar.
This component integrates seamlessly with Google's Material Design principles, ensuring a consistent and intuitive user experience across the Android ecosystem. To fully appreciate its benefits, it's helpful to compare it directly with the legacy ActionBar.
| Feature | ActionBar (Legacy) | Toolbar |
|---|---|---|
| Placement | Fixed at the top of the activity window. | Can be placed anywhere in the XML layout. |
| Customization | Limited styling options, primarily through themes. | Highly customizable via XML attributes, styles, and can contain custom child views. |
| Implementation | Provided by the system theme by default. | Added as a widget to a layout file, requiring explicit setup. |
| Flexibility | Rigid structure. | Can be used as an ActionBar or as a standalone component. Multiple Toolbars can exist on one screen. |
Implementing a Basic Toolbar: A Step-by-Step Guide
Adding a Toolbar as your activity's app bar is a straightforward process. By following these steps, you can replace the default ActionBar and gain full control over your app's primary navigation area. The official Android Developers documentation recommends this approach for ensuring consistent behavior across all devices.
-
Ensure Your Activity Extends AppCompatActivity
The Toolbar from the AndroidX library is designed to work with
AppCompatActivityto provide backward compatibility. Make sure your target activity extends this class.class MainActivity : AppCompatActivity() { // ... } -
Use a NoActionBar Theme
To prevent the system from showing the default ActionBar alongside your custom Toolbar, you must apply a
NoActionBartheme to your application or activity. Open yourres/values/themes.xmlfile and set the parent of your app's theme accordingly.<resources> <!-- Base application theme. --> <style name="AppTheme" parent="Theme.MaterialComponents.DayNight.NoActionBar"> <!-- Customize your theme here. --> </style> </resources> -
Add the Toolbar to Your XML Layout
Next, add the
androidx.appcompat.widget.Toolbarwidget to your activity's layout file. It's common to place it at the top, inside anAppBarLayoutfor proper shadow and scrolling behavior.<LinearLayout xmlns:android="http://schemas.android.com/apk/res/android" xmlns:app="http://schemas.android.com/apk/res-auto" android:layout_width="match_parent" android:layout_height="match_parent" android:orientation="vertical"> <com.google.android.material.appbar.AppBarLayout android:layout_width="match_parent" android:layout_height="wrap_content"> <androidx.appcompat.widget.Toolbar android:id="@+id/my_toolbar" android:layout_width="match_parent" android:layout_height="?attr/actionBarSize" android:background="?attr/colorPrimary" android:elevation="4dp" android:theme="@style/ThemeOverlay.AppCompat.ActionBar" app:popupTheme="@style/ThemeOverlay.AppCompat.Light"/> </com.google.android.material.appbar.AppBarLayout> <!-- Rest of your layout --> </LinearLayout> -
Set the Toolbar as the App Bar in Your Activity
Finally, in your activity's
onCreatemethod, get a reference to the Toolbar and pass it to thesetSupportActionBar()method. This call designates your Toolbar to function as the activity's official app bar.override fun onCreate(savedInstanceState: Bundle?) { super.onCreate(savedInstanceState) setContentView(R.layout.activity_main) // Find the toolbar view and set it as the action bar val toolbar: androidx.appcompat.widget.Toolbar = findViewById(R.id.my_toolbar) setSupportActionBar(toolbar) }With these steps completed, your app now features a basic, functional Toolbar. You can now proceed to customize its appearance and add interactive elements.
Advanced Toolbar Customization: Menus, Navigation, and Theming
The real power of the Android Toolbar is unlocked through customization. You can modify everything from its color and title to adding complex action items and navigation controls. This allows you to create a user interface that is both functional and aligned with your app's unique design language.
Adding Action Items and an Overflow Menu
Action items provide users with quick access to important actions. To add them, you first define a menu in an XML resource file. Create a new file in res/menu/, for example, main_menu.xml.
<?xml version="1.0" encoding="utf-8"?>
<menu xmlns:android="http://schemas.android.com/apk/res/android"
    xmlns:app="http://schemas.android.com/apk/res-auto">
    <item
        android:id="@+id/action_search"
        android:icon="@drawable/ic_search"
        android:title="Search"
        app:showAsAction="ifRoom" />
    <item
        android:id="@+id/action_settings"
        android:title="Settings"
        app:showAsAction="never" />
</menu>
The app:showAsAction attribute controls whether the item appears directly on the Toolbar (ifRoom or always) or in the overflow menu (never). To display this menu, override onCreateOptionsMenu in your activity:
override fun onCreateOptionsMenu(menu: Menu): Boolean {
    menuInflater.inflate(R.menu.main_menu, menu)
    return true
}
To handle clicks on these menu items, override the onOptionsItemSelected method:
override fun onOptionsItemSelected(item: MenuItem): Boolean {
    return when (item.itemId) {
        R.id.action_search -> {
            // User chose the "Search" item
            true
        }
        R.id.action_settings -> {
            // User chose the "Settings" item
            true
        }
        else -> super.onOptionsItemSelected(item)
    }
}
Customizing Appearance and Theming
You can easily customize the Toolbar's appearance directly in your XML layout file or through themes. Common attributes include setting the title, subtitle, colors, and navigation icon.
<androidx.appcompat.widget.Toolbar
    ...
    app:title="My App"
    app:subtitle="Dashboard"
    app:titleTextColor="@android:color/white"
    app:subtitleTextColor="@android:color/white"
    app:navigationIcon="@drawable/ic_menu" />
For more extensive styling, you can define a custom theme in styles.xml and apply it to the Toolbar using the android:theme attribute. This approach is excellent for maintaining a consistent design across your application and simplifies layout files.
Once you've set a navigation icon, you can listen for clicks on it by calling setNavigationOnClickListener in your activity's onCreate method. This is commonly used to open a navigation drawer or to handle 'up' navigation events.
Leveraging the Toolbar's Full Potential
The Android Toolbar is more than just a replacement for the ActionBar; it's a flexible and essential component for building modern, interactive, and visually appealing user interfaces. By mastering its implementation—from the initial setup to advanced customization with menus and themes—you gain the ability to craft navigation experiences that are perfectly tailored to your users' needs. Because it functions as a standard ViewGroup, its potential is limited only by your creativity. You can embed custom widgets, apply complex animations, and fully integrate it into your app's unique architecture, making it a cornerstone of high-quality Android app design.
Frequently Asked Questions
1. Where is the toolbar in Android?
From a developer's perspective, the Toolbar is a widget that you can place anywhere in an activity's XML layout file. Most commonly, it is placed at the top of the screen to serve as the primary app bar, displaying the screen title, navigation icons, and action menu. However, its flexibility allows it to be placed at the bottom or even as a floating element within the layout.
2. How do I change the toolbar on Android?
You can change or customize a Toolbar in several ways. In the XML layout, you can use attributes like app:title, android:background, and app:titleTextColor to modify its basic appearance. For more complex changes, you can define a menu resource file to add action items and an overflow menu. Programmatically, in your Kotlin or Java code, you can set click listeners, change the title dynamically, and interact with its menu items.
3. What is the difference between an ActionBar and a Toolbar?
The main difference is flexibility. The ActionBar is a legacy component that is rigidly fixed to the top of an activity and offers limited customization options. The Toolbar, its modern successor, is a ViewGroup that can be placed anywhere in a layout, styled extensively, and can contain other custom views. This makes the Toolbar far more powerful for implementing modern Material Design patterns.


