Step 1: Define Clear Goals and Pick the Right YouTube Videos
Ever wonder why some repurposed content drives real results, while others fall flat? The answer often lies in what you choose to repurpose and how you set your goals. Before you let any youtube to blog post ai tool work its magic, it’s crucial to lay the right groundwork—starting with video selection and search intent mapping.
Map Video Intent to Search Intent
Sounds complex? Let’s break it down. Imagine you have three high-performing YouTube videos. Each one attracts lots of comments, long watch times, and frequent saves. But will turning any of them into a blog post actually serve your audience—or your business goals?
- High Engagement: Look for videos with strong watch time and lots of comments. These are signals that the content resonates.
- Retention Rate: Prioritize videos with 45%+ average view duration. High retention means viewers are finding value throughout the video (YouTube Analytics Guide).
- Relevance to Your Niche: The video should address a topic that aligns with your audience’s needs and your blog’s focus.
- Evergreen Potential: Choose content that will remain valuable for months to come, not just trending topics.
Next, match each video’s viewer intent to a specific search intent. This ensures your repurposed blog post meets what searchers are actually looking for—not just what viewers enjoy watching.
| Video Intent | Search Intent | Target Keyword |
|---|---|---|
| How-to tutorial | Informational | video to blog |
| Product review | Commercial | youtube to blog |
| Case study/Success story | Problem-solving | videotoblog |
Matching content with search intent is critical for ranking success—92% of SEO professionals agree it’s the #1 factor.
Choose Long-Tail Targets with Purchase or Problem-Solving Intent
Choosing the right keywords is just as important as picking the right video. Instead of broad terms, focus on long-tail keywords that reflect what users want to solve or buy. For example, instead of just “video to blog,” try “how to convert YouTube video to blog post for beginners.”
Long-tail targets help your content stand out and attract readers who are more likely to engage or convert.
Outline Your Blog Angle Before AI Drafting
Before you feed anything into an AI generator, outline your blog’s unique angle. What problem will the post solve? What’s your key takeaway? Draft a one-sentence thesis to guide the AI and keep your post focused.
This post will show you how to turn your best YouTube videos into high-impact blog posts that attract search traffic and deliver real value—step by step, no guesswork.
Here’s a simple workflow to get started:
- Audit your YouTube Analytics to spot videos with high retention and engagement.
- Break down the video into key segments that map to common search intents.
- Turn those segments into scannable blog sections with benefit-focused H2s.
- Pre-select 1–2 long-tail keywords for your headline and subheads.
- Write a clear thesis statement to keep your AI output on track.
For example, if you’re repurposing a how-to tutorial with a 45%+ average view duration, outline your blog to flow from the problem, to step-by-step solutions, to proof, and finally next actions. Note any internal links you plan to add—like related guides or a glossary—to boost engagement and SEO.
By starting with clear goals and a strategic selection process, you’ll set every youtube to blog post ai project up for success. Ready to move on? Next, we’ll show you how to capture and clean an accurate transcript for seamless AI drafting.

Step 2: Capture an Accurate Transcript and Clean It Fast
Ever tried using a youtube video to blog post generator and ended up with a messy, unreadable draft? The root cause is almost always a poor-quality transcript. If your input is full of errors, the AI’s output will be too. That’s why cleaning and segmenting your transcript is a step you can’t afford to skip—especially if you want your video to blog workflow to deliver real value.
Choose the Right Transcript Source
When you’re starting out, you’ll notice there are several options for getting a transcript from your YouTube video. YouTube’s auto-captions are fast and free, but not always precise. Dedicated video to text converter -login -account tools or platforms like subeasy.ai can offer more control and sometimes higher accuracy. Here’s how the main sources compare:
| Source | Est. Accuracy | Cost | Best Use Case |
|---|---|---|---|
| YouTube Auto-Captions | ~90–93% | Free | Quick drafts, short videos |
| Manual Captioning | 98%+ | Time/paid | High-stakes, technical content |
| Third-Party AI Tools | 92–95% | Free/low | Long videos, multiple speakers |
AI-generated captions are a great starting point, but studies show they average about 90–93% accuracy under good conditions (BOIA). For instructional posts or anything technical, aim for at least 95% accuracy by sampling and correcting errors before moving on.
Clean and Segment for Skimmable Sections
Sounds tedious? Not with a good system. Imagine you’ve just exported your captions—now what? Here’s a simple process to clean and prepare your transcript for a youtube to blog post ai workflow:
- Remove timestamps and speaker tags: Use find-and-replace or regex to strip out time codes and generic speaker labels.
- Strip filler words: Delete "um," "like," and other verbal tics that don’t add value.
- Correct domain terms: Double-check technical names, brands, or jargon for accuracy using a spellcheck pass.
- Segment by topic: Break the transcript into logical sections—150 to 250 words each—so each chunk can become a blog paragraph.
For videos with on-screen demos or visuals, jot down non-verbal cues as notes. These can be repurposed as image captions or sidebars in your blog post. If you’re working with interview-style content, keep speaker turns but summarize with a consistent, journalistic voice for readability.
Quantify Accuracy Before You Draft
Before you feed your cleaned transcript into any youtube video to blog post generator, always check its accuracy. Here’s a quick method:
- Pick a 2–3 minute segment at random.
- Compare the transcript with the original audio.
- Count the number of errors—aim for less than 5 per 100 words for a 95%+ accuracy rate.
Manual review is still essential. Even the best AI struggles with accents, technical language, or overlapping speakers. Research shows that combining automated tools with a human quality check yields the best results.
Here’s a clean transcript segment for AI drafting:
"Today, I’ll show you how to convert your YouTube video into a detailed blog post. First, we’ll export the captions, then clean and organize the text for easy reading. By the end, you’ll have a ready-to-publish draft that matches your audience’s search intent."
By investing a little extra time in transcript cleaning, you’ll avoid the classic “garbage-in, garbage-out” trap. Now that your transcript is ready, let’s move on to designing prompts that ensure your AI turns that clean input into a structured, SEO-friendly draft.
Step 3: Design Prompts for Structure, Accuracy, and SEO
Ever pasted a transcript into an AI tool and ended up with a jumbled, off-topic draft? You’re not alone. The difference between a mediocre youtube to blog post ai draft and a polished one often comes down to prompt engineering. Let’s break down how to craft prompts that turn your cleaned transcript into a structured, factual, and SEO-optimized blog post—without hallucinations or wasted effort.
Outline-First Prompting for Clear Sections
Sounds complex? It’s easier than you think. Imagine you want a 1 click blog post workflow, but with human-level structure. Start by telling the AI exactly what you want the blog to cover, using clear, sectioned instructions. The more specific your prompt, the better the results.
Copy-Paste Prompt Template:"Using the transcript below, create an H2/H3 outline that addresses [search intent]. For each section, provide bullet steps, relevant examples, and a clear takeaway. Maintain a friendly, expert tone."
By specifying the structure upfront, you help the AI organize the content logically, making it easier for readers to scan and for search engines to understand.
Fact-Checking Prompts to Kill Hallucinations
Ever seen an AI invent facts or cite sources that don’t exist? That’s called an AI hallucination—and it’s a real risk when using one click blog post generators. To prevent this, add clear fact-checking instructions:
Accuracy Prompt:"Review the draft and tag any unverified claims as [VERIFY]. Add placeholders for sources where citations are needed."
This keeps your draft honest and makes editorial review much easier.
| Transcript Snippet | Raw AI Output | Edited Final |
|---|---|---|
| "In 2023, over 60% of marketers used video content." | "In 2023, 75% of marketers used video content, according to a recent study." | "In 2023, over 60% of marketers used video content [VERIFY: add source]." |
| "Let’s walk through three easy steps to repurpose your video." | "Repurposing video is simple and only takes two steps." | "Let’s walk through three easy steps to repurpose your video." |
Note: Edits ensure claims match the transcript and unverified data is flagged for review.
SEO Prompts for Titles and Meta
Want your draft to rank? Guide the AI to produce SEO-friendly titles and meta descriptions. This is where long-tail keywords like 1-click blog post come in handy.
SEO Prompt:"Generate 5 title options under 60 characters and 160-character meta descriptions, each including the target keyword: [youtube to blog post ai]."
Compare weak vs. improved prompt phrasing:
- Weak: "Write a blog post about video to blog."
- Improved: "Using the transcript, draft a blog post for beginners on converting YouTube videos to blog articles, with H2s for each main step, bullet lists, and a summary. Keep all claims traceable to the transcript and add [VERIFY] tags for any new facts."
Set Consistency and Editorial Standards
To keep your output on-brand and easy to edit, always define the desired voice, target reader, and reading level in your prompt. For example:
- Voice: Friendly, expert, and conversational
- Target reader: Content creators and marketers
- Reading level: 8th–10th grade
This reduces the risk of generic or off-tone drafts (PromptHub).
Editing Checklist for Every AI Draft
Before you move to the next step, make sure your AI output passes this quick test:
- All claims are traceable to the transcript or flagged as [VERIFY]
- Section headers (H2/H3) match the outline and search intent
- Suggestions for internal links and image prompts are included
- Meta title and description use the target keyword
- Voice and tone are consistent throughout
By engineering your prompts with these best practices, you’ll transform your youtube to blog post ai workflow from guesswork to a repeatable, high-quality process. Next, you’ll see how to put these prompts into action with your first AI-powered draft.

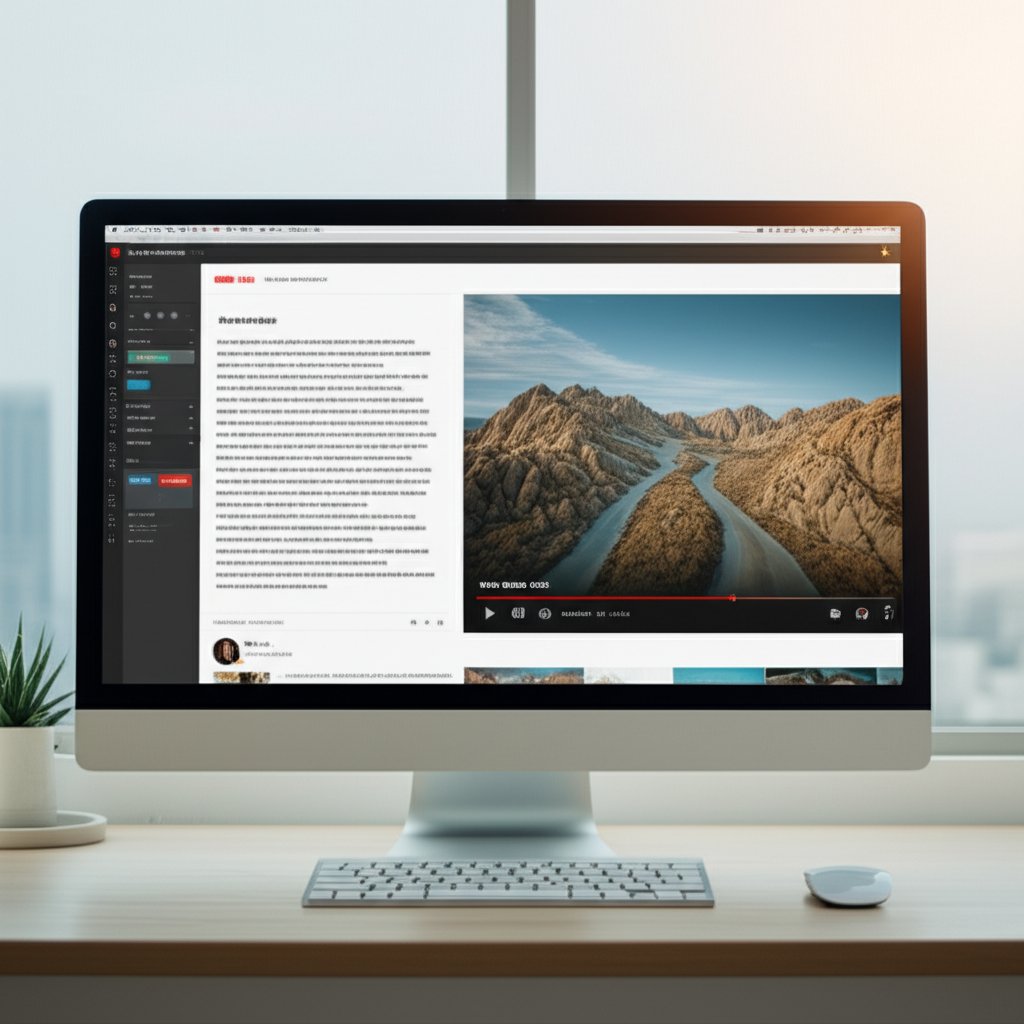
Step 4: Generate a High-Quality First Draft with BlogSpark
Ever wish you could turn your cleaned transcript into a polished blog post in minutes—without wrestling with formatting or SEO? That’s where a modern blog post generator like BlogSpark comes in. Imagine going from YouTube URL to ready-to-edit draft, all while keeping your structure, keywords, and editorial standards intact. Here’s how to make that happen—step by step.
Set Templates and Guardrails for Factual Drafts
When you’re ready to draft, the right settings make all the difference. Sounds technical? It’s actually straightforward. BlogSpark and similar videotoblog ai tools let you start by simply pasting your YouTube URL or cleaned transcript. From there, select the “Video to Article” template, which is optimized for transforming video content into well-organized blog posts. This template is designed to recognize chapters, pull out main ideas, and keep your content focused on your target audience’s needs.
- Paste your YouTube URL or cleaned transcript. This gives the tool everything it needs to analyze your content.
- Select the “Video to Article” template. BlogSpark’s template is built for chapter-aware structuring and SEO optimization.
- Choose your tone and audience. Want a friendly, expert voice for marketers? Or a step-by-step guide for beginners? Set it here.
- Add your target keyword and secondary terms. Make sure terms like “videotoblog.ai,” “video blogster,” or “blog post generator” are included for maximum search relevance.
- Toggle hallucination guardrails and citation placeholders. This ensures your draft stays factual and makes it easy to add sources during editing.
- Click Generate. Let the AI do the heavy lifting—your structured draft will be ready in seconds.
Turn Chapters into Scannable H2s
One of the most powerful features of BlogSpark is its ability to break your video into logical, scannable sections. Instead of a wall of text, you’ll get:
- Chapter-aware structuring: Each main video segment becomes an H2, making your post easy to scan and SEO-friendly.
- SEO title and meta suggestions: Automatically generated options tailored to your keywords and target audience.
- Image prompt ideas: Suggestions for visuals based on video content, ready to use as captions or illustrations.
- Internal link helper: Prompts for related articles or glossary terms to boost engagement and crawlability.
- Export to CMS: One-click export to WordPress or your preferred platform for seamless publishing.
Want to see this in action? Try the AI Blog Post Generator for yourself—no login needed. You’ll notice how quickly you can go from transcript to blog-ready draft, all while keeping your editorial workflow tight.
Export Cleanly to Your CMS
Once you’ve reviewed your draft, exporting is a breeze. BlogSpark’s export options let you move your content directly into your CMS, preserving formatting, subheadings, and even meta data. This means less time copying, pasting, and reformatting—and more time focusing on what matters: editing and publishing.
- Lock your headline before generation to steer the narrative and avoid AI drift.
- Seed 3–5 subheadings from your transcript’s chapters for a logical, search-friendly structure.
- Enable a “sources needed” list for editorial quality control—making it easy to add citations before publishing.
Tip: Always generate two variants of your post to A/B test titles and intros. In a crowded 2025 search landscape, the right headline can be the difference between a click and a scroll-past.
By following this workflow, you’ll turn your YouTube content into search-optimized, human-friendly blog posts—fast. Next up, we’ll show you how to refine that draft for clarity, SEO, and conversion.
Step 5: Edit for Clarity, SEO, and Conversion
Ever wonder why some AI-generated blog drafts sound robotic or miss the mark with readers? The magic happens in the editing phase. Once your first draft is ready, it’s time to transform it from a "good start" into a post that both humans and search engines will love. Here’s how to refine your youtube to blog post ai output for clarity, SEO, and conversion—without losing your unique voice or reader trust.
Headline and Hook Templates that Match Intent
Sounds like a small detail? Headlines and intros are your first—and sometimes only—chance to grab attention. A benefit-driven headline can boost your click-through rate by up to 25% compared to generic titles. Try these headline formulas for your video blogger content:
- "How to Turn [Video Topic] into a Blog Post—Step-by-Step Guide"
- "[Number] Proven Ways to Repurpose Your YouTube Videos for Blog Traffic"
- "From YouTube to Blog: The Fastest Way to Boost Your [Keyword] Reach"
And for hooks, open with a relatable scenario or a surprising stat—anything that shows you understand the reader’s problem and have a solution.
SEO Title/Meta Examples:1. "Free Youtube to Blog Post AI Generator: No Login Needed"Meta: "Convert YouTube content to blog posts instantly—no account required. Try this free AI tool."
2. "Turn Videos into Blog Posts Fast with AI—No Sign Up!"Meta: "Transform YouTube videos into SEO blog posts in minutes. Free, secure, and easy to use."
3. "Blog Video Content Made Easy: YouTube to Blog AI Workflow"Meta: "Repurpose your video content with AI. Create blog posts from YouTube videos—no login needed."
On-Page SEO and Internal Linking Patterns
When editing, it’s easy to focus on style and forget structure. But on-page SEO is just as important. Here’s a quick checklist to optimize your blog video posts:
- Keep H2s benefit-first: Make sure each section heading promises a clear value or solution.
- Break up long lists: Use numbered steps or bullet points for clarity.
- Short paragraphs: Aim for 2–3 sentences per chunk for easy reading.
- Add images: Include one image per scroll depth, with descriptive alt text for accessibility and SEO.
- Internal links: Point to at least two related guides and one glossary page. This keeps users exploring and improves crawlability (SEMrush).
- Authoritative citation: Add one outbound link to a trusted source for credibility.
Internal linking is more than just navigation—it boosts engagement, distributes authority, and helps Google understand your site structure. For example, if you have a glossary page on "AI content editing," link to it when the term appears in your post.
| Video Type | Length (min) | Est. Manual Edit Time |
|---|---|---|
| Talking Head | 5–10 | 20–30 min |
| Interview | 10–20 | 30–45 min |
| Tutorial/Demo | 15–30 | 40–60 min |
Tip: Editing times vary by complexity. Plan accordingly to avoid rushed, low-quality posts.
Calls-to-Action that Don’t Kill Trust
Ever felt turned off by a pushy CTA? You’re not alone. The best calls-to-action in a blog to video ai workflow are soft, contextual, and focused on helping the reader—not just selling.
- After your solution section: "Want more tips on repurposing video content? Check out our in-depth guide to video SEO."
- At the end: "Ready to try this workflow? Start turning your YouTube videos into blog posts today—no login required."
- For education: "Explore our glossary for definitions of key AI and blogging terms."
Keep CTAs relevant and low-pressure—your readers will thank you with higher engagement and trust.
Final Polish: Consistency, Quotes, and Accuracy
Before you hit publish, do a dual-pass edit:
- First pass: Check for clarity, flow, and coherence. Remove repetitive or vague sentences. Replace generic claims with direct quotes from your transcript.
- Second pass: Focus on SEO—confirm all target keywords are present but not overused, internal and external links are in place, images have alt text, and terminology is consistent.
Fact-check any numbers or technical details by referencing your original video or trusted sources. This builds credibility and reduces the risk of misinformation.
Editing is where your youtube to blog post ai content truly shines—making it both valuable for readers and ready for search engines. Next, we’ll cover how to handle legal and ethical considerations when reusing video content for your blog.
Step 6: Handle Legal Attribution and Ethical Reuse
When you turn YouTube videos into blog posts, it’s easy to focus on content and forget about rights and responsibilities. But skipping legal and ethical checks can expose you to copyright claims or even takedowns. So, how do you protect yourself and respect creators while building a youtube to blog post ai workflow?
Attribution and Linking Best Practices
Imagine you’ve just finished a draft using a transcript from someone else’s video. What next? Attribution isn’t just a nice-to-have—it’s often a requirement, especially with Creative Commons or third-party content. Good attribution should always answer: Who made the original? Where can readers find it? What license applies?
- Verify the channel’s license or your ownership: Only use videos you own, have rights to, or are clearly licensed for reuse (such as Creative Commons with adaptation allowed).
- Quote sparingly and clearly: Use quotation marks and keep direct quotes minimal. Summarize or paraphrase where possible to create new value.
- Attribute the creator and link to the original video: Always include the video title, channel name, and a link to the source. For Creative Commons, add the license type (Creative Commons Best Practices).
- Avoid implying endorsement: Make it clear that your blog post is independent and not sponsored or approved by the original creator.
- Replace copyrighted visuals: Don’t reuse video images or graphics unless you have explicit permission. Use your own screenshots, diagrams, or royalty-free visuals instead.
- Maintain a changelog: Keep track of all edits, paraphrased sections, and direct quotes to stay transparent and organized.
When Fair Use May Apply
Wondering if you can use short video excerpts or quotes under fair use? U.S. law considers four factors: purpose, nature, amount, and market effect. Transformative uses—like adding commentary, critique, or educational value—have a better chance of qualifying (Stanford Fair Use Center). Still, fair use is a legal gray area and only a court can give a definitive answer. When in doubt, use less, add new insights, and avoid copying the "heart" of the work.
What To Avoid in Repurposed Posts
- Don’t rely on disclaimers like "No Copyright Intended"—they offer no legal protection.
- Never use copyrighted music, images, or large text segments without permission.
- Avoid using CC BY-ND or CC BY-NC-ND works for adaptations—these licenses prohibit derivative works unless you have separate permission.
- For interviews, always secure consent for quoted material and anonymize any sensitive or personal information.
- If you’re unsure, ask the creator for written permission, especially if your blog has commercial intent.
Attribution template:
"This post includes material adapted from the YouTube video '[Video Title]' by [Channel Name], published on [Publish Date]. View the original at: [Video URL]."
By following these guidelines, you can confidently turn blog post to video or turn articles into videos—and vice versa—while respecting both the letter and spirit of copyright law. Next, we’ll show you how to optimize your repurposed content with the right technical SEO and structured data for maximum search visibility.

Step 7: Add Structured Data, Embeds, and Canonicals for Maximum Visibility
Ever wonder why some video blogspot or youtube blogspot posts show up as eye-catching rich results, while others barely get noticed? The secret often lies in technical SEO—specifically, how you structure, embed, and signal your content for search engines. If you want your youtube to blog post ai workflow to deliver real search visibility, these steps are non-negotiable.
VideoObject and Article Markup for Rich Results
Sounds complex? Not when you break it down. Google uses structured data—like VideoObject and Article JSON-LD—to understand and showcase your content in search. Adding these markups makes your posts eligible for rich results, which can include video previews, enhanced thumbnails, and extra details in the SERPs (Google Structured Data Gallery).
- Add schema.org VideoObject and Article JSON-LD: Mark up each post with both
VideoObject(for the embedded video) andArticle(for the blog content) to maximize eligibility for rich features. - Embed the YouTube video near the introduction: Place your video embed above the fold—ideally within the first screenful—to boost dwell time and engagement.
- Write a unique summary: Don’t just copy the YouTube description. Craft a fresh intro for your blog that summarizes the video in a way that’s distinct and search-friendly, preventing duplicate content issues.
- Ensure descriptive alt text: For all images and video thumbnails, use alt text that clearly describes the visual—avoid stuffing keywords.
Here’s a quick reference for key VideoObject fields:
| Field | Example | Notes |
|---|---|---|
| name | How to Repurpose Videos for Blogspot | Unique title for each video |
| description | Step-by-step guide to turning YouTube videos into blog posts | Distinct from YouTube description |
| uploadDate | 2025-06-01 | Use ISO 8601 format |
| contentUrl/embedUrl | https://www.youtube.com/embed/abc123 | Direct link to the video player |
| potentialAction | WatchAction | Signals video intent to Google |
Canonicalization and Duplicate Handling
Repurposing video content for multiple platforms (like video blogspot or article to video ai workflows) can create duplicate or near-duplicate content. To avoid search confusion and dilution, use the rel=canonical tag correctly. Place it in the <head> of your HTML, always using an absolute URL to your preferred version (Google Duplicate URLs Guide).
- Set the canonical tag to your main blog post if the same content appears elsewhere (e.g., blogspot and your main site).
- Update your XML sitemaps to reflect the canonical URLs—this helps search engines understand your preferred content.
- Reserve canonical tags for near-identical content, not for loosely related posts.
Proper canonicalization consolidates authority, prevents index bloat, and ensures your best version ranks.
Faster Pages, Better Engagement
Ever clicked a blog only to wait for slow images or videos to load? You’re not alone. Fast-loading pages keep readers engaged and reduce bounce rates. Here’s how to optimize your youtube blogspot or video blogspot posts for speed:
- Enable lazy-loading: Use the
loading="lazy"attribute on images and iframes so they only load when visible. - Compress images: Use modern formats like WebP and keep file sizes under 100KB where possible.
- Submit updated XML sitemaps: Every time you add or update a post, resubmit your sitemap to help Google discover changes quickly.
- Add breadcrumbs and FAQ schema only if needed: Breadcrumbs help users navigate, and FAQ schema can enhance your post—just avoid adding unnecessary markup if it doesn’t serve the user.
"Technical SEO isn’t just about pleasing search engines—it’s about making your repurposed content more discoverable, actionable, and user-friendly. By embedding structured data, using canonicals wisely, and prioritizing speed, you set your blog up for sustainable, long-term growth."
With your technical SEO in place, your next step is to measure performance and iterate—ensuring your article to video ai and blog repurposing strategies continue to improve with every post.
Step 8: Track KPIs, Run Experiments, and Scale Updates for Continuous Growth
Ever wondered if your new youtube to blog post ai workflow is actually moving the needle? It’s easy to launch a fresh blog to video or article to video strategy and hope for the best—but real growth comes from measuring, testing, and iterating. Here’s how to turn your video blog repurposing into a data-driven engine for sustainable results.
A/B Test Titles and Intros for Maximum Impact
Sounds like a lot of work? Not when you break it into simple experiments. Headlines and introductions are your first chance to capture attention—so why settle for just one version? Set up A/B tests by rotating 5 headline variations over a 14-day window, measuring which drives more clicks and engagement. If your click-through rate (CTR) drops below 2.5%, swap in a new meta description or rewrite your intro for clarity and relevance.
| KPI | Tool | Target | Owner |
|---|---|---|---|
| Impressions | Search Console | +10% MoM | SEO Lead |
| CTR | Search Console | >2.5% | Content Editor |
| Avg. Position | Search Console | Top 10 | SEO Lead |
| Organic Users | Analytics | +15% MoM | Growth Team |
| Avg. Engagement Time | Analytics | >1:30 min | Content Editor |
| Scroll Depth | Analytics | >70% | Growth Team |
| CTA Conversions | Analytics | +5% MoM | Content Editor |
Monitor Engagement and Update Cadence
When you review your Analytics dashboard, you’ll notice some posts soar while others stall. Don’t guess—let the data guide you. Track average engagement time and scroll depth to see if readers are sticking around or bouncing early. If engagement drops below your site median, it’s time to refresh intros, tighten up content, or add more visuals (Jetpack).
- Review metrics weekly for new posts and monthly for evergreen content.
- Document which blog to video or article to video formats (tutorials, interviews, demos) drive the longest engagement.
- Segment results by topic and intent stage to spot high-converting niches before scaling to broader audiences.
Regular analysis helps you spot seasonal trends, identify content that needs updating, and catch sudden drops—sometimes caused by competitor moves or algorithm changes. Aim to update underperforming posts within 48–72 hours of major SERP movement.
Build a Lightweight Experiment Log
Sounds overwhelming? Imagine a simple spreadsheet or dashboard where every test, tweak, and outcome is logged. Note which transcript features (like clear step-by-step demos versus open-ended interviews) correlate with higher engagement or conversions. This makes it easy to replicate what works and avoid repeating mistakes.
Success Criteria: "A repurposed post is a win when it delivers a higher CTR, longer engagement time, and more conversions than your site’s median. Next steps: Run headline and intro A/B tests, monitor user behavior, and update posts rapidly as new data comes in. Iterate what works—retire what doesn’t."
By tracking the right KPIs and running frequent, focused experiments, you’ll transform your youtube to blog post ai workflow from a one-off project into a scalable, high-impact content engine. Next, we’ll compare leading tools and outline how to build a sustainable, repeatable pipeline for video-to-blog success.

Step 9: Compare Tools, Choose BlogSpark, and Launch Your Video to Blog AI Workflow
Choosing the right tool can make or break your video to blog ai strategy. With so many AI generators and converters out there, how do you pick the one that fits your workflow, budget, and quality standards? Let’s break down the top options, what to look for, and how to build a pipeline that scales—whether you’re a solo creator or part of a content team.
Best Overall for Video to Article Workflows
Imagine you want a generator blog tool that not only converts YouTube videos into SEO-friendly posts, but also lets you control tone, structure, and export options. Here’s a side-by-side comparison of leading platforms, featuring BlogSpark first as a best practice:
| Tool | Pricing | Output Controls | SEO Tools | CMS Export | Languages | Privacy Settings |
|---|---|---|---|---|---|---|
| BlogSpark | Flexible plans, free trial | Custom structure, tone, keyword targeting | Built-in; meta, headings, keyword research | Direct to WordPress, export HTML | 30+ | Strong; team and project controls |
| Team-GPT | Premium | Prompt builder, model choice | Manual, via prompt | In-app editor | Multiple | Team workspaces |
| RyRob | Free | Basic summary, no customization | Limited | No | English | Minimal |
| GravityWrite | Tiered | Transcript-based, keeps voice | Headers, intro/conclusion | No direct export | Multiple | Basic |
| RightBlogger | Free & paid | URL/transcript input, embeds | SEO keywords, internal linking | Manual copy/export | Multiple | Basic |
| Video Blog AI | Free & paid | Blog length, tone, file upload | SEO-optimized, multi-language | No direct export | 30+ | Standard |
- BlogSpark stands out for its customizable structure, built-in SEO tools, and direct CMS exports, making it ideal for both solo creators and teams.
- Team-GPT offers granular control with prompt building and collaboration, but setup can take longer.
- RyRob is perfect for fast, free summaries, but lacks deep customization or export options.
- GravityWrite and RightBlogger excel at transcript-based conversion and SEO basics but may require more manual editing.
- Video Blog AI is strong for multi-language support and long-form content, though export is less direct.
When to Use Lightweight Converters
Not every project needs a full-featured generator blog platform. If you just want a quick summary or a base draft, free tools like RyRob or basic versions of Video Blog AI can save time—especially for low-stakes or internal content. But for public-facing, SEO-driven posts where brand voice and structure matter, you’ll want the advanced controls of BlogSpark or Team-GPT.
How to Build a Sustainable Pipeline
Imagine scaling your url to ai video workflow across dozens of posts each month. The key is standardizing your process and tools. Here’s a simple action plan to keep your pipeline efficient and repeatable:
- Choose three high-potential YouTube videos based on audience signals.
- Clean and segment transcripts for each, ensuring accuracy.
- Generate two BlogSpark drafts per video to A/B test structure and tone.
- Edit, add structured data, and optimize for SEO and conversion.
- Publish, test multiple headlines, and monitor performance weekly.
- Iterate based on analytics—refine what works, update or retire what doesn’t.
For teams serious about accuracy, SEO, and publishing speed, standardize your prompts and QC checklist from this guide. This ensures every blog to video ai free or video-to-blog post meets your brand’s standards—no matter who’s running the workflow.
Ready to put this into practice? Try the AI Blog Post Generator for your next project. With BlogSpark, you can take a YouTube video, generate a fully structured, SEO-optimized post, and export directly to your CMS—all in a few clicks. It’s the fastest way to turn your video content into compound search results, no login required.
Repurpose once, compound results across search: with the right workflow and tools, every YouTube video can become a high-impact blog post that drives ongoing organic growth.
YouTube to Blog Post AI FAQs
1. How can I convert a YouTube video into a blog post using AI?
To convert a YouTube video into a blog post with AI, start by selecting a high-engagement video, extract and clean the transcript, and use an AI-powered blog post generator like BlogSpark. This tool lets you paste the video URL or transcript, select a template, and generate a structured, SEO-friendly draft ready for editing and publishing.
2. What are the best free tools for turning YouTube videos into blog posts?
Popular free tools include BlogSpark, RightBlogger, RyRob, and Video Blog AI. BlogSpark stands out for its customizable structure, direct CMS export, and built-in SEO features, making it ideal for both beginners and professionals seeking high-quality, search-optimized blog content.
3. Do I need a login or account to use YouTube to blog post AI generators?
Many top tools, such as BlogSpark and RyRob, offer free access without requiring a login or account. This allows you to quickly test and generate blog posts from YouTube videos without sharing personal information or going through lengthy sign-up processes.
4. How do I ensure the AI-generated blog post is accurate and SEO-optimized?
Ensure accuracy by cleaning the transcript, using structured prompts that instruct the AI to keep claims traceable, and flagging unverified information. For SEO, select long-tail keywords, optimize headings and meta descriptions, and add internal links and descriptive alt text to images. Tools like BlogSpark help automate much of this process.
5. What legal considerations should I keep in mind when repurposing YouTube videos into blog posts?
Always verify you have permission to use the video content. Attribute the original creator, link to the video, and avoid reusing copyrighted visuals. For interviews or third-party videos, secure consent and check licensing terms. Summarize or paraphrase content where possible and maintain a changelog of edits for transparency.